Pages

Sunday, March 14, 2010

Stain on your T-Shirt? Paint over it and make a new design!

If your like me, on the occasion I get a stain on my shirt. A perfectly good shirt. So what do you do with it? Paint it. These two examples are of a few different types of painting. Spray paint, brush on paint and sharpie markers.
This first example is with a sharpie marker.  This nice v neck shirt had a lovely olive oil mark that would not come out.  So one night I took a piece of cardboard under the shirt so the marker wouldn't bleed through the other side of the shirt and went to town.  I like swirls and curly-Q's.  I decided to take the patten on a diagonal.  Think of the shirts you see at Target or in a your favorite pattern on fabric and have fun!  I even put fun words hidden in the pattern, you may see love, laugh, live, family and a few other symbols.  Make it your own.


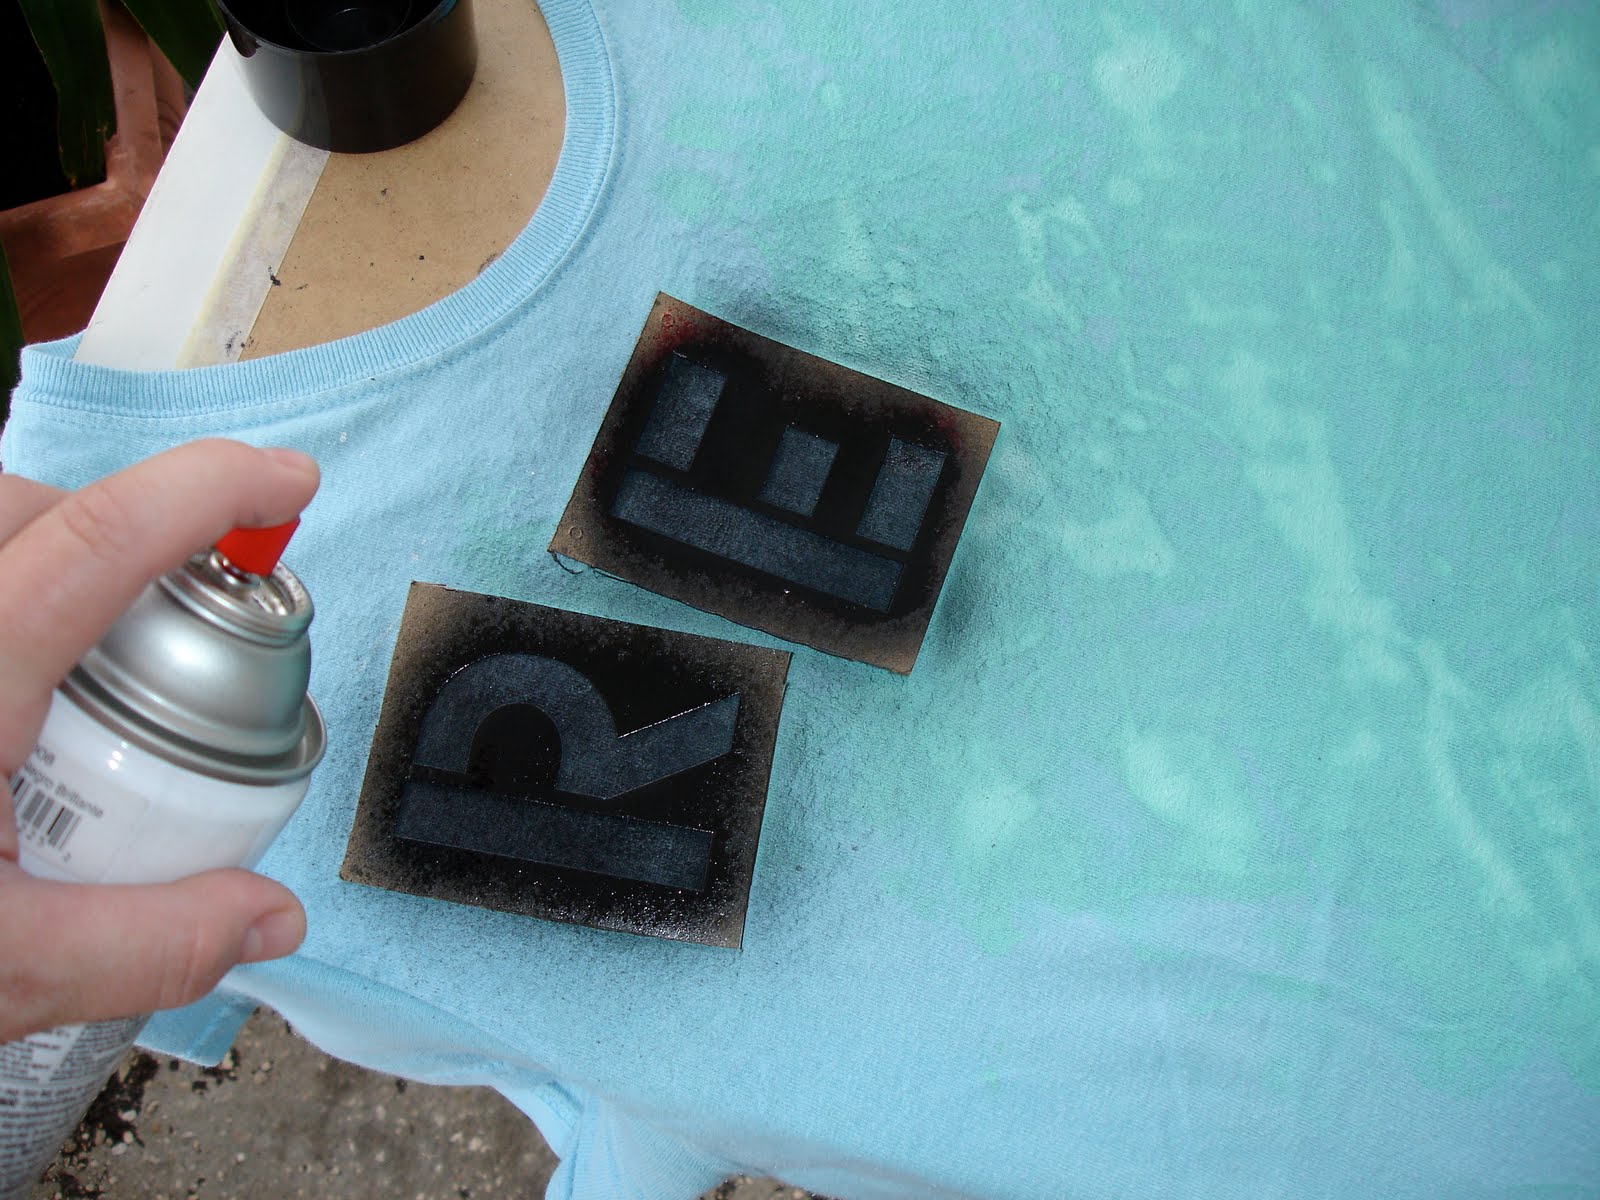
In this example, I have already gotten splattered paint on this shirt from painting in it.  Then I took stencils and spray painted on the stencils. 


Then I took another style of stencil and sharpie and marketed the letter outlines.  With similar colors I painted in the outlines of the letters.  Now you have a new shirt.  Wear it proud it's your creation! 

Friday, January 29, 2010

Artificial Christmas tree to fun palm tree

First take a simple artificial Christmas tree with removable branches out of your storage or pick up one from a thrift shop.  Other items that you will need for this project are the following: 
- flower pot or basket
- rocks (any color)
- burlap (1-2 yards)
- scissors
- twine
- sea shells
- string of lights (any color)

Now that you have your supplies ready.  Take the rod and just the top portion of the Christmas tree.  Take the very top branch and cut the greenery of of the wire.  This will be the part of the tree top that will now go into the rod.  The top of the rod should already have a hole in it for the Christmas tree purposes.  Now that the wire is securely in the rod, you want to shape the branches as similar to that of a palm tree.  They need to hang downward with a slight bend at the bottom.  If it looks to bushy, you can always cut some of the branches off (you may need strong wire cutters for that).  keep 4 small branches down along the rod.


Next you want to take your flower pot/basket, rocks, and rod.  We will now be anchoring the rod into the pot.  I used a few larger pieces of rock and then smaller white rocks to support the rod to stay upright.


Now that the rod is anchored and supported in the pot.  You want to take the burlap and scissors and cut strips of 6 inches wide .  These strips will be used to create the bark of the tree by wrapping around the rod in a spiral pattern.  When going from one strip to the next tuck the burlap into each other and use safety pins if necessary to secure the strips. 


When the burlap reaches the top of the rod secure the burlap in place with the twine to the bottom branches.  If you get the natural twine it will match the burlap well.  Now take the time to move the burlap around to look a bit bumpy as to give the effect of palm bark.
 Now take your sea shells and fill the rest of the pot or basket to the top.  Take the string of lights and start at the bottom with enough wire to reach the outlet put aside.  Begin by wrapping the string of lights upward in a spiral spaced evenly with the length of the string of lights you have.  If you are using a short string of lights then you can spaced them further apart.  If the string of lights are long then not so far apart.

Monday, October 5, 2009

RePurpose Old Bike Tires Into a Stamp


Take those old busted bike tires out of the garage or trash dumpster and give em new life!


Items you will need: 
  • Old Bike Tire
  • Utility Knife
  • Adhesive (Liquid Nails)
  • Scrap Wood
  • Hand Saw


You may have some old tires around your garage but if you don't...go to your local bike shop and ask them for any old tires that they may be disregarding.  The bike shop that I went to had a huge trash bin full of them.


Using your utility knife cut the tire to the desired length.  I wanted to cover most of my 12x 12 paper, for scrapbooking.  


With your piece of scrap wood and hand saw cut the scrap wood to the same length of the piece of tire.


Place adhesive on the wood and in the inside of the tire strip.  Hold the tire against the wood firmly for a few moments.  You may want to place the wood and tire under a brick of something else you may have handy.  


After the adhesive has dried take your utility knife and cut any excess tire from the sides of the wood.  


Then your bike tire stamp is done.  Grab some ink and your paper and go for it.  I used a bike rental day while in Nantucket for the stamp.  You could also use it for;  "child's first bike ride", "day the training wheels came off", "bike race"...


On the previous photo I used the stamp for a header and on this photo the stamp is across the page...looking like someone biked right over it.  Enjoy and happy stamping!


RePurposed by DESIGN. Design by Wpthemedesigner. Converted To Blogger Template By Anshul Tested by Blogger Templates.